It is often that we break our frontend view into some smaller panes to show different groups of user data. This imposes a challenge since the data inside those panes might lose some readability especially if the data (such as text) in those panes are extensive. Sometimes we add horizontal scroll bars for each pane that enable users to read through them. However, putting multiple scroll bars is ugly, and also using a horizontal scroll is difficult for users.
A good approach to overcome this situation is to use resizable panes. This means that we enable our users to resize those data panes based on their needs instead of forcing them to scroll over.
Here we see how to implement a resizeable pane in React.
Before starting: I assume you know how to create a React app and are familiar with basics such as class components and states.
Here is my app package config:
"dependencies": {
    "@testing-library/jest-dom": "^5.16.3",
    "@testing-library/react": "^12.0.0",
    "@testing-library/user-event": "^12.0.0",
    "react": "^17.0.2",
    "react-dom": "^17.0.2",
    "react-router-dom": "^5.2.0",
    "react-scripts": "5.0.1",
    "web-vitals": "^2.1.4",
    "query-string": "^7.1.1"
  },
First, Let’s create some panes to render
In the first step, we create our new class component named ResizeablePane. Inside this component, we implement our render. It renders two side-by-side panes plus one line between them. This line would be our resize line later.
Note: Do not change the name of the classes and Ids in the rendering part since the rest of the code depends on them.
import React from "react";

class ResizeablePane extends React.Component{

    render(){
        return (
            <div className="resizable-container">
                <div className="pane-box" id="page-left-pane">
                    Left Content
                </div>
                <div className='page-resize-vertical-line'></div>
                <div className="pane-box" id="page-right-pane">
                    Right Content
                </div>
            </div>
        );
    }
}

export default ResizeablePane;
In the next step, we add our CSS to style them and keep them side by side:
Note: I assume you know how to import the CSS into your React component. I imported it into my App.jsx but of course you can do it anywhere else you like.
.resizable-container{
  display: flex;
  height: 500px;
  width: 700px;
  background-color: rgb(0, 0, 0);
  margin: auto;
  margin-top: 20px;
}

.page-resize-vertical-line{
    cursor: e-resize;
    width: 10px;
    border-left: 1px solid black;
}

.pane-box{
    background-color: rgb(223, 173, 173);
    float: left;
    position: relative;
    height: 500px;
    overflow-x: hidden;
    width: 350px;
    line-height: 250px;
}
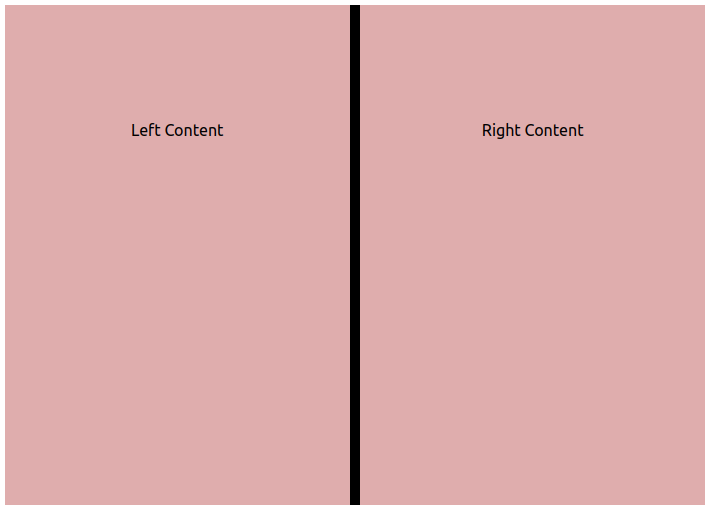
After doing this the page should look like this:

Resizing Implementation
The first things we need here are two state variables. The first one will keep the last position of the resize vertical line and the second one is used to tell us whether the resize is ongoing or not. The latter we need since the resize works based on dragging the resize vertical line by holding the mouse click on it.
So we define these in our class constructor:
constructor(props){
        super(props);
        this.state = ({
            lastVerticalLinePositionX: 0,
            isResizeOn: false
        });
    }
To implement the resize, we need to take care of three stages in it:
- Resize Start: When a user clicks the mouse on the vertical resize line.
- During Resize: When the user keeps the mouse click down to drag to resize
- Resize is done: When the user releases the mouse click.
Resize start
The resize starts when the user clicks the mouse on the page. The very first thing we need to check is that the target clicked object has to be our vertical resize line. If not, we skip it. Otherwise, we set the current position for our vertical line and turn on the resize variable in the state.
 onMouseDown(event){
        let targetElement = event.target;
        if (!targetElement.classList.contains('page-resize-vertical-line')){
          return null;
        }
        this.lastVerticalLinePositionX = event.clientX;
        this.setState({
            isResizeOn: true
        });
    }
During Resize
Here we check first that the resize is on. If yes, we do:
- Get the added width which is the difference between the current position of the vertical line and its last position. This can be positive or negative depending on the resize direction to left or right.
- Then we apply the added width on the left and right panes.
- In the end, we update the last position of the vertical line to the current position
moveToResize(event){
        if(!this.state.isResizeOn){
          return null;
        }
        let addedWidth = (event.clientX - this.lastVerticalLinePositionX) / 1;
        let pageLeftPane = document.getElementById("page-left-pane");
        let pageRightPane = document.getElementById("page-right-pane");
        let currentWidthLeft = parseInt(pageLeftPane.offsetWidth);
        let currentWidthRight = parseInt(pageRightPane.offsetWidth);
        pageLeftPane.style.width = (currentWidthLeft + addedWidth) + "px";
        pageRightPane.style.width = (currentWidthRight - addedWidth) + "px";
        this.lastVerticalLinePositionX = event.clientX;
        this.setState({
            lastVerticalLinePositionX: event.clientX
        });
  }
Resize is Done
At last, we just check if the resize is on, and we turn it off.
releaseMouseFromResize(event){
        if(!this.state.isResizeOn){
          return null;
        }
        this.setState({
            isResizeOn: false
        });
  }
The Last Step
Before we use our new resize feature, we need to do one last but important step. We need to bind our resize events to mouse events in our component. We use component life cycle built-in functions in the class. Read here and here.
componentDidMount(){
        document.body.addEventListener("mousedown", this.onMouseDown);
        document.body.addEventListener("mousemove", this.moveToResize);
        document.body.addEventListener("mouseup", this.releaseMouseFromResize);
    }

componentWillUnmount(){
        document.body.removeEventListener("mousedown", this.onMouseDown);
        document.body.removeEventListener("mousemove", this.moveToResize);
        document.body.removeEventListener("mouseup", this.releaseMouseFromResize);
   }
Hooray! Our feature is now ready to use. Just move the mouse over the vertical line and drag it to the left or right!
Here is the link to this source code: https://github.com/Pooya-Oladazimi/blog-post-app/blob/main/src/components/paneResize.jsx
The End.

